Do you want to know how to adjust your Starlink Snow Melt settings? If so, you have stumbled upon the right article.
Starlink introduced the Snow Melt feature around December 2020. This feature was likely developed in response to user complaints about snow affecting the performance of their Starlink service.
The Snow Melt mode generates additional heat to prevent snow from building up on the dish, ensuring better signal reception during harsh winter conditions.
As someone living in a snowy region, the Starlink Snow Melt feature has been a game changer for maintaining consistent internet connectivity.
Before this feature, I would often find myself braving the cold to manually clear snow from my dish just to stay online.
Now, with the ability to activate Snow Melt through the Starlink app, I can manage the dish’s temperature from the comfort of my home, saving me both time and effort.
This not only enhances my internet experience but also ensures that I remain connected when I need it most.
In this article, I have shared everything you need to know about Starlink Snow Melt.
So, without any further ado, let’s get started.
How Does the Starlink Snow Melt Mode Work?
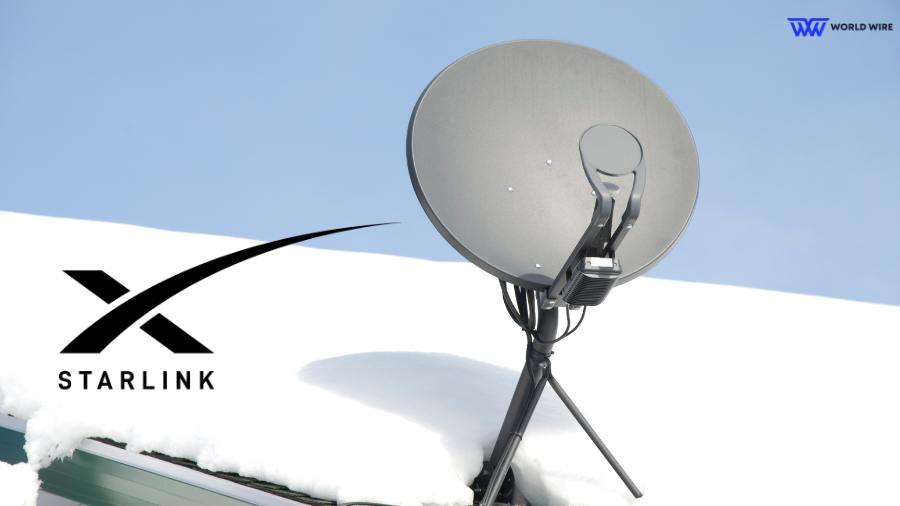
Before we head to Starlink Snow Melt working, let’s know what it is!
Basically, Starlink Snow Melt Mode is a feature designed to keep your antenna clear of snow and ice, ensuring there are no Starlink connection issues and uninterrupted internet service during winter weather.
And now, how it works! So, the snow melt mode works by using built-in heaters in the antenna to melt snow and ice that accumulate on the surface.
These heaters automatically activate when the system detects low temperatures and precipitation, preventing snow buildup that could block the signal.
This smart feature ensures your Starlink dish remains functional and provides a reliable connection even in harsh weather conditions.
Types of Starlink Snow Melt
Starlink offers flexible snow melting options to keep your antenna clear and maintain optimal performance during winter weather:
Automatic Mode
The built-in heaters activate automatically when the system detects low temperatures and the presence of snow or ice, ensuring continuous operation without manual intervention.
Manual Mode
Users can manually activate the snow melting feature through the Starlink app, allowing them to turn on the heaters as needed, such as before a forecasted snowstorm.
These options allow users to choose to let the system manage itself or take control when specific weather conditions are anticipated.
How To Adjust The Starlink Snow Melt Settings
Starlink’s Snow Melt mode is a handy feature that helps keep your internet running smoothly during winter months by preventing snow buildup on your dish.
Here’s how you can adjust the Snow Melt settings to ensure optimal performance:
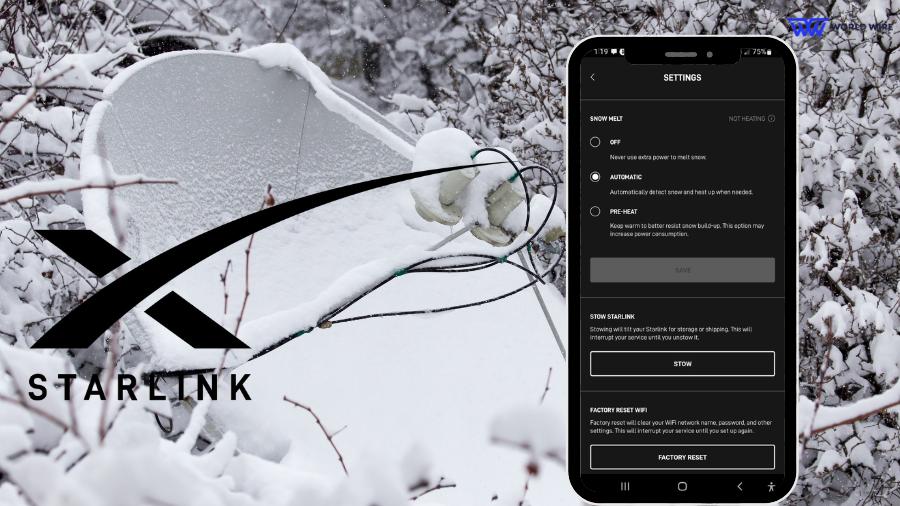
- Access the Settings: Open the Starlink app on your device and navigate to the settings menu. Look for an option labeled “Starlink”. There, you will see settings named “Snow Melt.” Click on it.
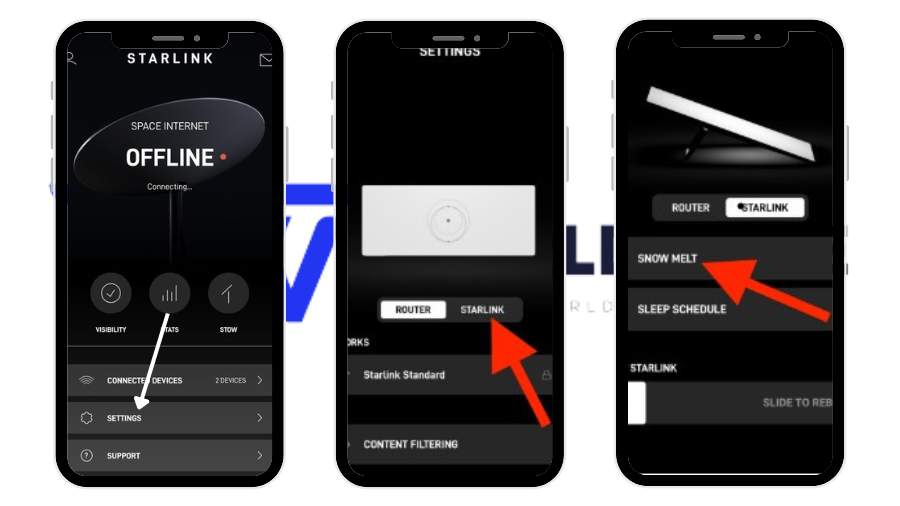
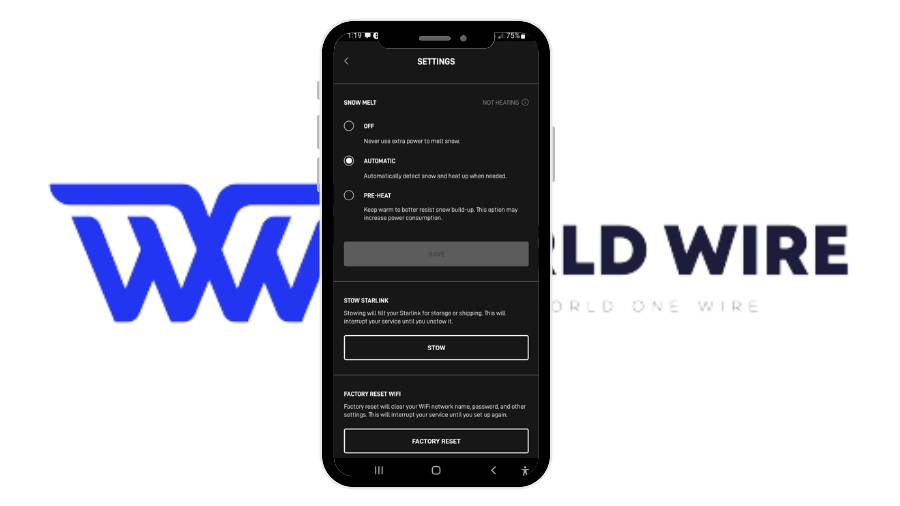
- Choose Snow Melt Mode: You’ll find 3 Starlink Snow Melt Modes.
-
- Off Mode: Use it if you live in an area where there is no Snowfall.
- Automatic Mode: Use it if you live in an area with heavy snowfall, as it will keep your dish warm.
- Pre-Heat Mode: Use it if it is about to snow in your area and you want to pre-heat your dish.
- Save the Settings: Once you’ve adjusted the heat to your preference, click on the save button.
Which Starlink Snow Melt Setting is Best for You?
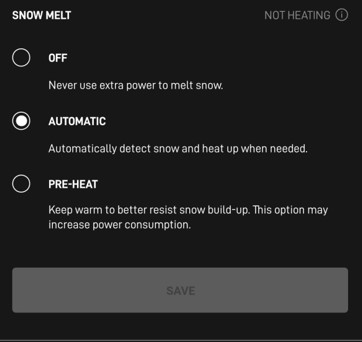
The Starlink dish includes several built-in options to handle snow accumulation. Choosing the best Starlink snow melt setting depends on your specific needs and the weather conditions in your area.
Here’s a quick guide to help you decide:
Off Mode
This option turns off the snow-melting feature. Users might choose this setting to conserve energy or when they anticipate minimal risk of snow buildup.
For example, if you live in an area where snowfall is rare or during a season when snow is not expected, you might turn off this feature to save on electricity.
Automatic Heat Mode
In this mode, the dish’s heaters activate automatically based on the detected temperature and the presence of snow or ice.
This setting is perfect for those who prefer a hands-off approach, letting the system manage itself to ensure continuous operation during winter weather.
For instance, if you live in a region with unpredictable snowfall, the automatic mode will ensure your dish stays clear without you having to monitor weather conditions constantly.
Pre-Heat Mode
This setting allows users to activate the dish’s heaters before an anticipated snowfall manually. By warming up the dish ahead of time, you can prevent snow from settling and interfering with the signal.
This proactive approach is particularly useful if you know a heavy snowstorm is approaching.
For example, if the weather forecast predicts a significant snowfall overnight, you can set your dish to pre-heat mode before going to bed, ensuring it remains snow-free and functional by morning.
Benefits of Starlink Snow Melt for Cold Climate Users

These features are amazing, especially for cold-climate users. Still, let’s consider a few more benefits associated with them.
- Reliable Internet Connection: The Snow Melt feature prevents snow buildup on the dish, ensuring you have a stable internet connection even during heavy snowfall.
- Automatic Operation: The system automatically activates the heaters when it detects snow, so you don’t have to clear the dish manually.
- Customizable Settings: You can adjust the heat intensity based on the expected snowfall, optimizing energy use and performance.
- Energy Efficiency: By fine-tuning the settings, you can save energy while keeping your dish clear of snow.
- Peace of Mind: Knowing that your internet connection won’t be disrupted by snow gives you one less thing to worry about during the winter months.
Troubleshooting Common Issues with Starlink Snow Melt Feature

Here are a few troubleshoots you can try to fix issues due to snow.
- Check for Power Supply: Ensure that the dish is receiving power and that the Snow Melt feature is activated in the settings. Get yourself a Starlink power cable replacement if the other one is damaged.
- Verify Connection: Confirm that the dish is properly connected to the Starlink network and that there are no loose cables or connections.
- Inspect Heater Functionality: Check if the heaters are functioning correctly by observing any visible signs of heat or warmth on the dish surface.
- Review Settings: Double-check the Snow Melt settings in the Starlink app to ensure they are configured correctly for your location and weather conditions.
- Clear Obstructions: Remove any Starlink obstruction, such as snow, ice, or debris obstructing the dish’s view of the sky, which may prevent the Snow Melt function from operating effectively.
- Update Firmware: Ensure that your Starlink dish firmware is up-to-date, as software updates may include improvements or bug fixes related to the Snow Melt feature.
- Contact Support: If the issue persists, contact Starlink customer support for further assistance and troubleshooting guidance.
FAQs
What is the Snow Melt feature on Starlink dishes?
The Snow Melt feature on Starlink dishes automatically activates heaters to prevent snow buildup and maintain internet connectivity during winter.
Can the Starlink Snow Melt feature be manually controlled?
Yes, it can be controlled manually. Its pre-heat and off mode requires manual adjustment to activate or deactivate the snow melting feature.
Is the Snow Melt feature available in all regions?
Yes, the Snow Melt feature is available in all regions where Starlink operates.
Does the snowmelt feature increase energy consumption?
Yes, the Snow Melt feature may increase energy consumption due to the activation of heaters to melt snow on the dish.
How do I know if my dish is in snow-melt mode?
You can verify if your dish is in Snow Melt mode through the Starlink app or by checking the dish’s settings.
Does using the Snow Melt mode affect the warranty of the Starlink dish?
No, using the Snow Melt mode does not affect the warranty of the Starlink dish.



Add Comment